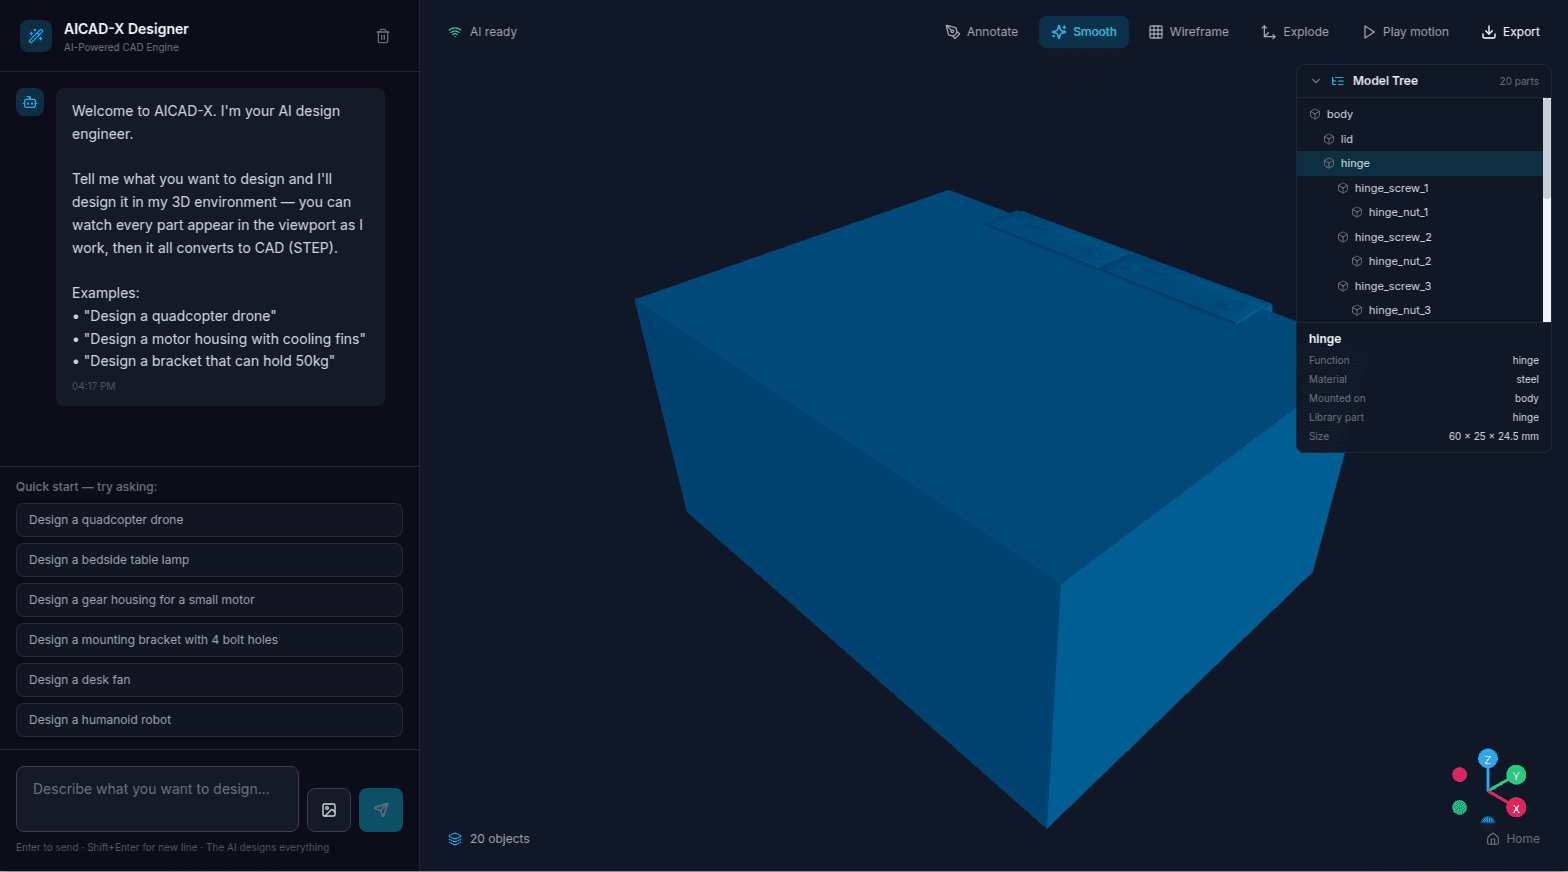
This is the editor
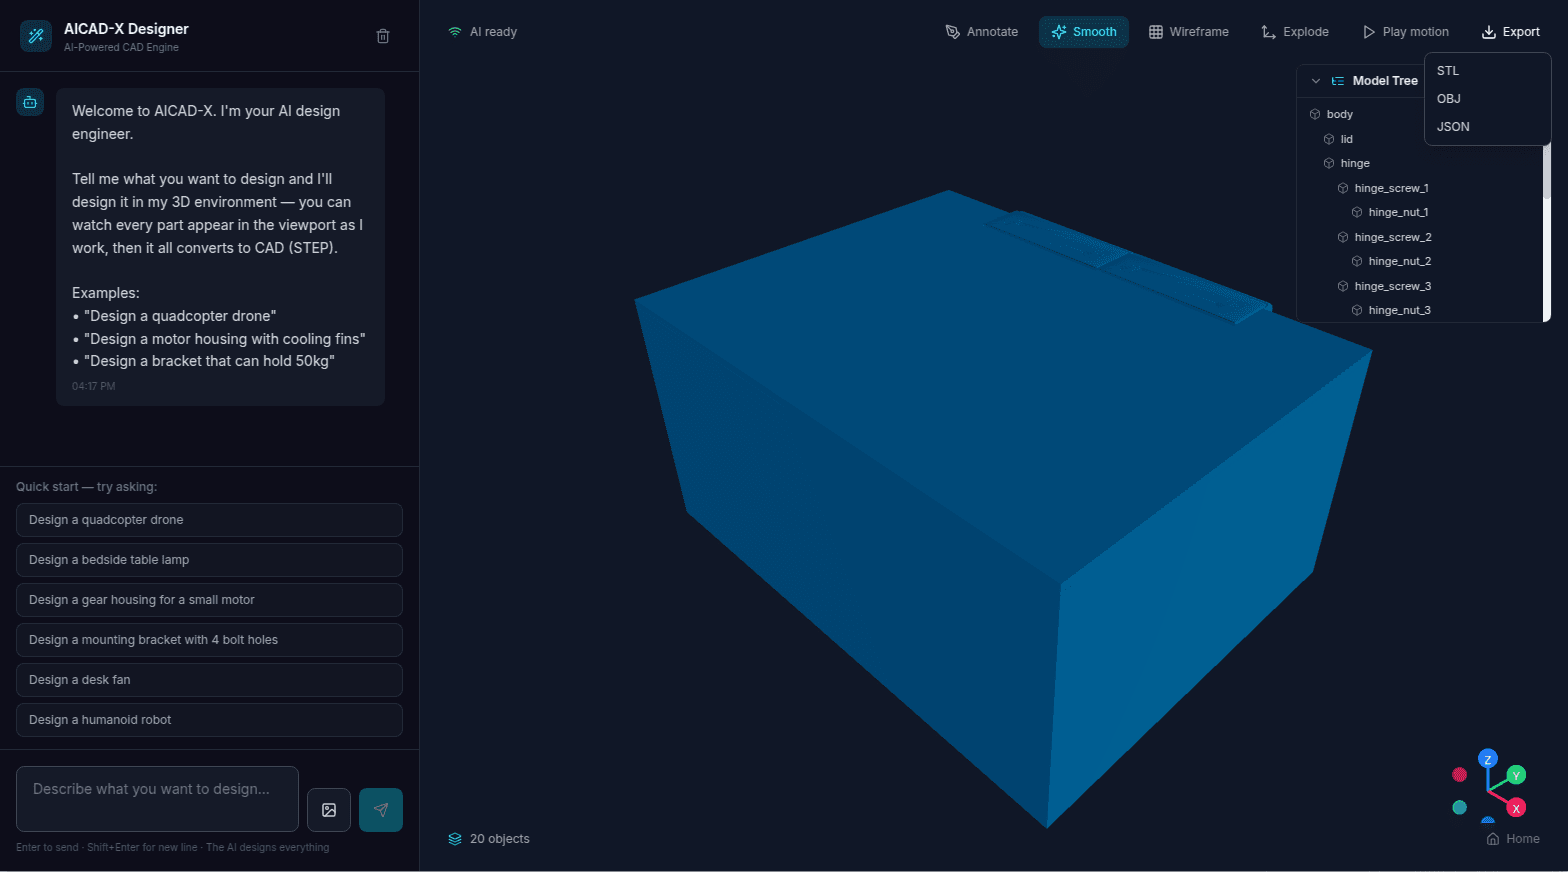
A real design, exactly as it appears in the browser: a sheet-steel box with a hinged plate lid, two folded hinges and the M4 bolts and nuts the AI chose. Press play to watch the lid swing open on its hinge pins and close flush — the same motion check the sandbox ran before it called the design finished.
The design flow, step by step
A simple box with a lid takes about 10–15 minutes from request to STEP files. Larger assemblies take longer because the AI checks and repairs more parts. Here is what happens and what you see at each step.
Describe what you want
Type it in plain English — "design a box with a lid", "a wall bracket for a 5 kg shelf", "a quadcopter frame for 5-inch props".
- No CAD knowledge needed. Say what it is, roughly how big, and what it is for.
- Attach reference photos if you have them — the AI reads them with its vision model.
- Once a design exists, circle an area on the viewport and say what to change in chat.
Answer the Engineering Choices
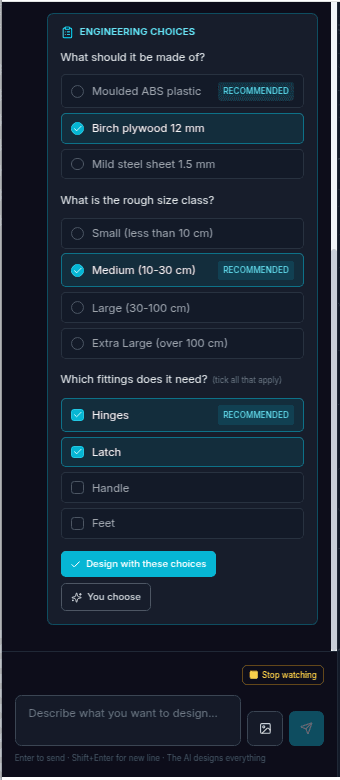
Before it designs, the engineer asks one to four short tick-box questions written for your request, with its recommended pick already ticked.
- Typical questions: what is it made of (moulded plastic, wood, sheet metal), rough size, what goes in it, hinge or latch style.
- Each answer changes the engineering — sheet steel becomes a bottom plate plus four wall panels; moulded plastic becomes one hollow shell.
- Not sure? Press "You choose" and the AI proceeds with its own recommendations.
The AI writes the engineering brief
The engineer turns your request and choices into a brief: every component and quantity, how each is formed, how it is constructed, what joins what, and the materials.
- A box in sheet steel: bottom plate + 4 wall panels, a plate lid, 2 hinges bridging body and lid, M4 through-bolts with nuts because 3 mm steel is too thin to tap.
- The brief is a contract — the build is checked against it, so a component cannot silently go missing or change form.
Watch it build in the 3D sandbox
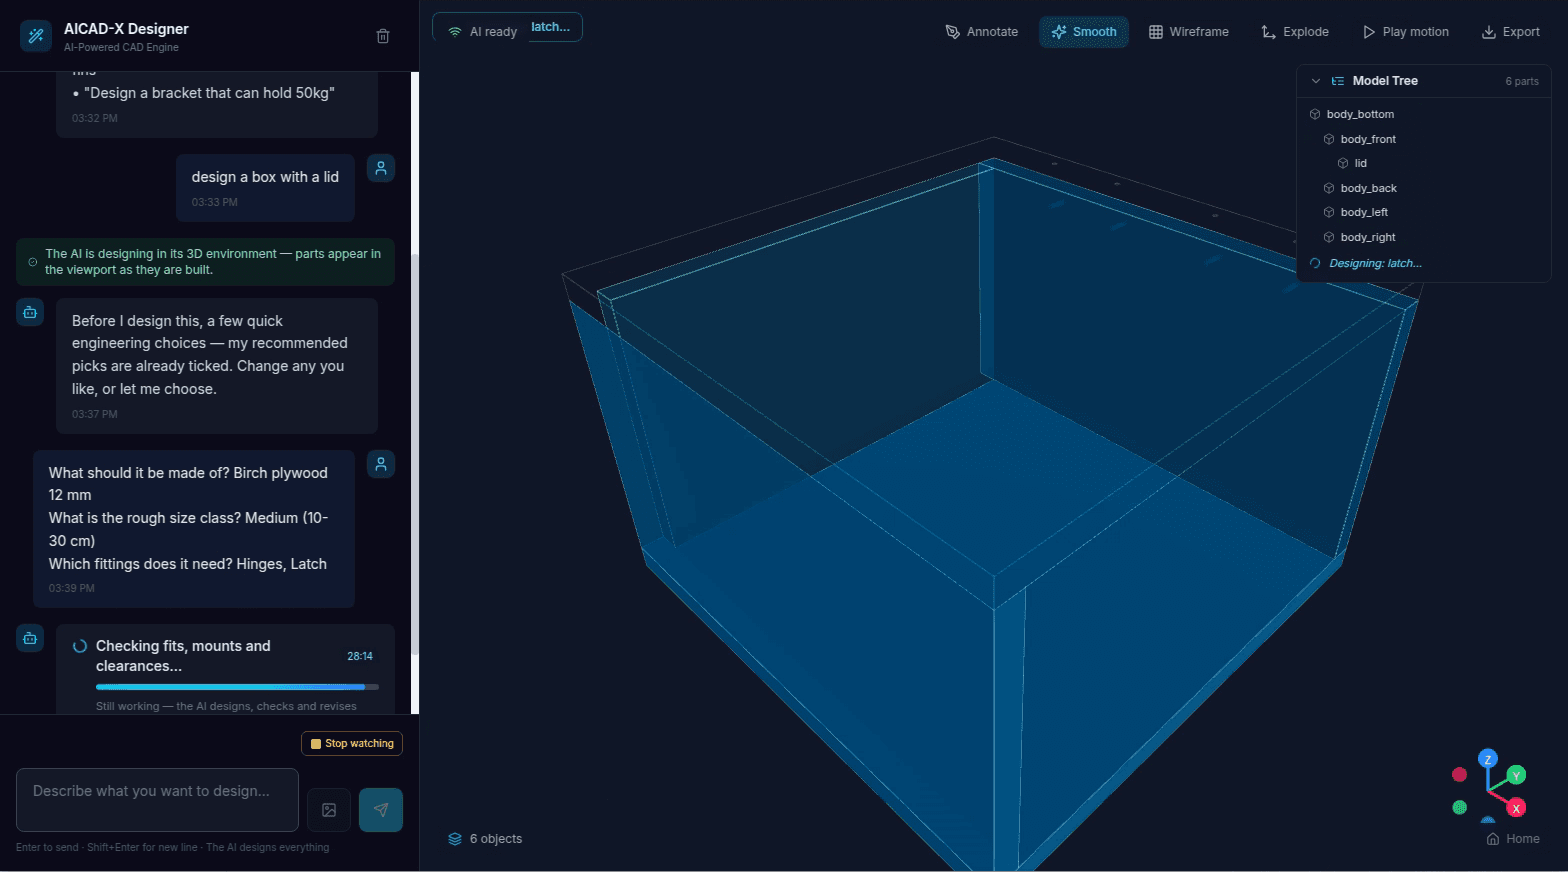
The AI writes a compact build program and runs it in its own Blender sandbox. Parts appear in your viewport as they are created, seated and fastened.
- Standard fittings — hinges, brackets, latches, motors, propellers, connectors — come from an engineered parts library with real mounting patterns.
- The sandbox drills the parts a fitting mounts to and seats the AI-chosen screws, bolts, nuts or rivets as real parts.
- Anything wrong is reported back to the AI, which repairs its program and tries again — you see each round in the event stream.
Inspect the finished design
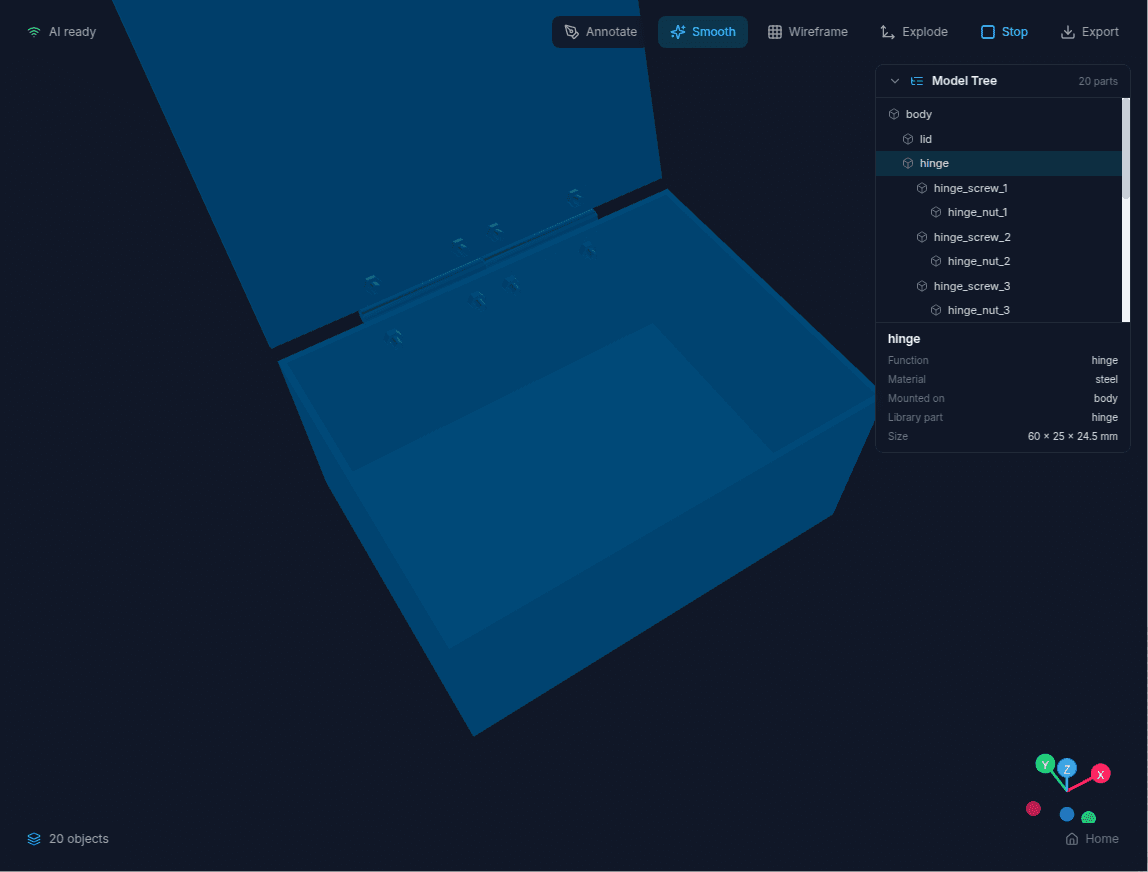
The editor looks like a CAD editor — viewport, Model Tree, Inspector — but it is read-only. You look; the AI does the CAD work.
- Model Tree: every part, including each screw and nut, arranged by what it is mounted on.
- Inspector: click a part to see its material, size in millimetres, what it is mounted to and its position.
- Viewport: orbit, zoom, Faceted / Smooth / Wireframe display, exploded view — all display modes, never edits.
Validation you can read
Every design is checked before it is handed to you. The results stream into the chat in plain language, not error codes.
- Fit: parts sit flush on what they mount to (gap 0.000 mm), panels meet at the edges without overhang.
- Collisions: no part passes through another; touching faces and mated pairs are allowed.
- Mounting and joins: a hinge must really touch both the body and the lid; fasteners must reach through both leaves.
- Materials: the built part uses the material the brief chose.
See moving parts move
A hinged lid, door or flap is swung about its real hinge pins in the sandbox: does it clear the rim, do the hinges stay attached, does it close flush?
- When the design completes, the motion plays once in your viewport; press "Play motion" to watch it again.
- The lid-side hinge leaves and their bolts swing with the lid, so you see inside the hollow body.
- If a mechanism does not work, the design fails honestly and says why ("hinge is turned the wrong way round…").
Download the engineering files
A finished design gives you STEP files for every part plus a placed assembly STEP, a GLB for the web or AR, and a rendered image — all under the Export button at the top of the viewport.
- STEP is the industry exchange format — open the files in any CAD package, send them to a machine shop or a 3D-print bureau.
- Every screw, nut and hinge is in the assembly STEP at the position it was fitted.
- The GLB is the same model you see in the viewport — use it for web previews or AR/XR review.
How you talk to it
There are no CAD tools to learn. You have three ways to tell the AI what you want, and the AI does all the modelling. Its reasoning is not hidden either — the brief, every check result and the reason behind each fastener choice are written into the chat as the design happens.
Chat
Describe the product, answer the Engineering Choices, and describe changes in plain words — the AI re-designs and re-checks.
Reference images
Upload photos or drawings of what you have in mind. The vision model reads them alongside your words.
Point and annotate
Circle or mark an area on the viewport and say what should change there. The AI edits the design; you never touch the geometry.
Key concepts
Engineering Choices
The tick-box questions the AI asks before designing — material, how it is made, size, contents, fittings — each with its recommended answer pre-ticked. Your answers become recorded design decisions.
Engineering Brief
The AI’s written plan: components and quantities, the form of each (solid, plate, hollow container), construction (one-piece shell or fabricated panels), what joins what, and materials.
Construction
How a body is made. A moulded, cast or printed body is one hollow piece; a wooden or sheet-metal body is a bottom plate plus wall panels. The AI decides this from the material you chose.
Fitting
A standard part from the library — hinge, bracket, latch, motor, connector — with a real mounting pattern. Fittings are seated on the parts they join and fastened through drilled holes.
Fastener Choice
The AI picks screws, bolts and nuts, heat-set inserts or rivets from material, wall thickness and access — e.g. "3 mm steel is too thin to tap: through-bolt with a nut" — and fits them as real parts.
Model Tree
The parts list of the design, nested by what each part is mounted on — body, lid, hinges, then every screw and nut. Read-only; click to inspect.
Validation
Deterministic checks run on the built geometry: fit, collision, mounting, joins, panel layout, materials and motion. A failing check sends the AI back to repair its own work.
STEP
The neutral CAD exchange format (ISO 10303). AICAD-X converts each sandbox part into a true solid and writes one STEP per part plus a placed assembly, so the files open in any CAD tool.